

Hello, hello, time for a new DIY! ;) Maybe you have already noticed that I have a new sponsor – welcome, Snaply! :) – and apart from advertising on my blog, Snaply sent me a package with lots of awesome things from their shop that I’ve chosen in order to show you what to make with their products. This tutorial will be the first of five posts telling you what to use KAMSnaps for. These are colorful plastic snaps which you can use for many different projects and they are so useful – can’t wait to show you all of my ideas. So here we go with the first project, a sewing DIY for a fabric bracelet. :)
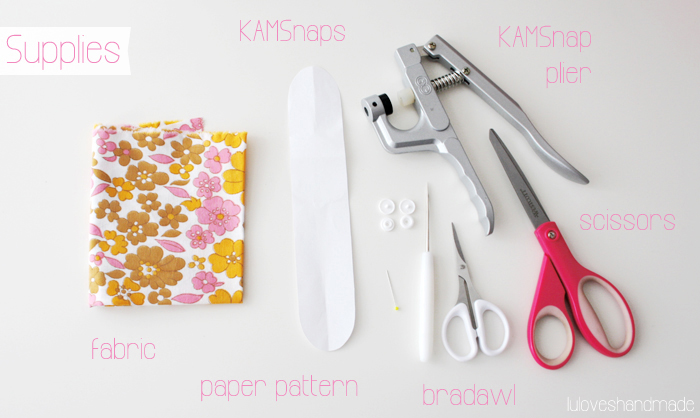
What you need:
– KAMSnaps, a KAMSnap plier and a bradawl
– Fabric
– Paper for the pattern
– Scissors (for fabric and paper)
– A sewing machine
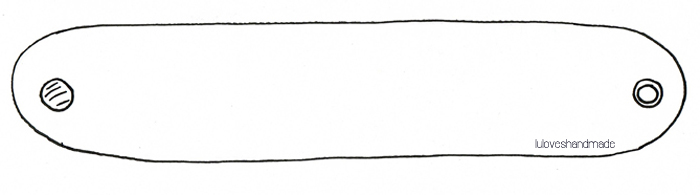

First of all, make yourself a pattern according to the shape above. You just need to find out your arm’s size and cut out the pattern according to it. It has to be long enough that you can easily put it around your arm and that both endings can overlap to close the bracelet. Concerning the width, you can simply decide how wide you want the bracelet to be, mine is 3cm wide (and don’t forget to include the seam allowances of about 0,5cm).
After you have prepared your pattern, use it to cut out fabric twice, one piece for the front, one piece for the back.

Next, put both layers of fabric onto each other, right sides facing. Sew them onto each other (sew close to the edges) and leave a small opening (on the photo on the left bottom corner between my fingers) to finally fold it inside out. Then cut out little triangles at the seam allowances of the round sides so that you can easily fold the fabric inside out.
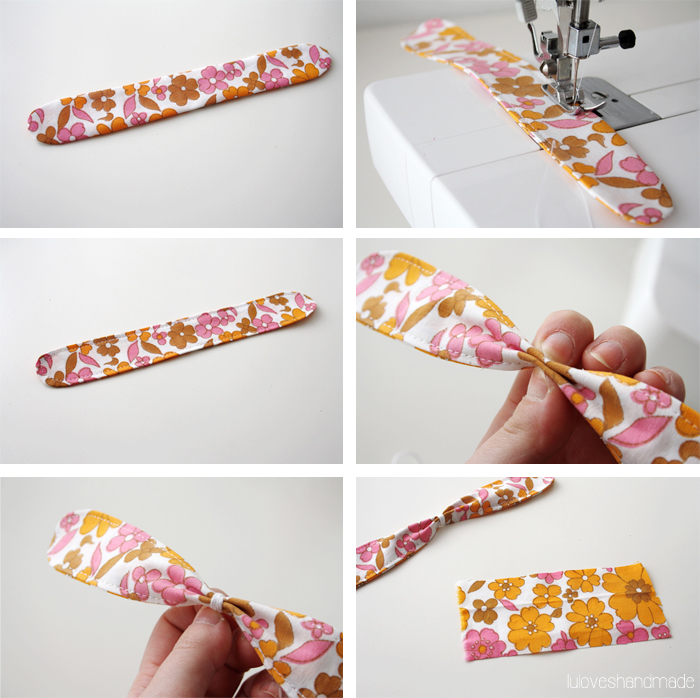
Now iron your piece of fabric and by sewing around the whole piece (close to the egde), you can neaten the edges. That makes it even prettier. Then take the middle of the piece of fabric and fold it like shown on the photo in the right middle. Use a piece of yarn to wrap it around and close it with a knot. Then cut out a small piece of fabric (about 6cm wide and 9cm long) which you will use to hide the yarn.
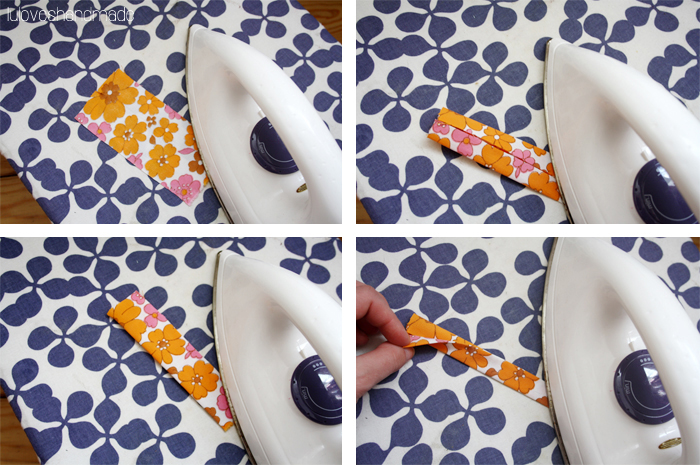
Iron the piece of fabric like it is shown above so that you finally have a smaller strip (about 1,5 wide).
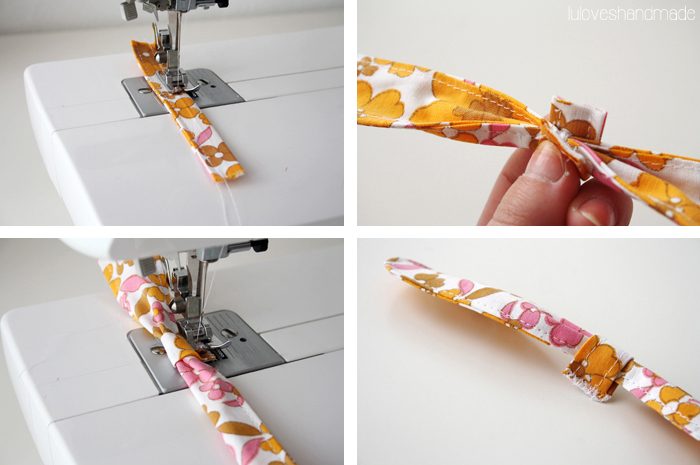
Fix the strip by neatening the edges with a seam and sewing the layers of fabric onto each other. Now fold the fabric strip around the bracelet and use your sewing machine to close the endings. In case they are too long, shorten them before sewing them onto each other (use a zig-zag stitch for that).
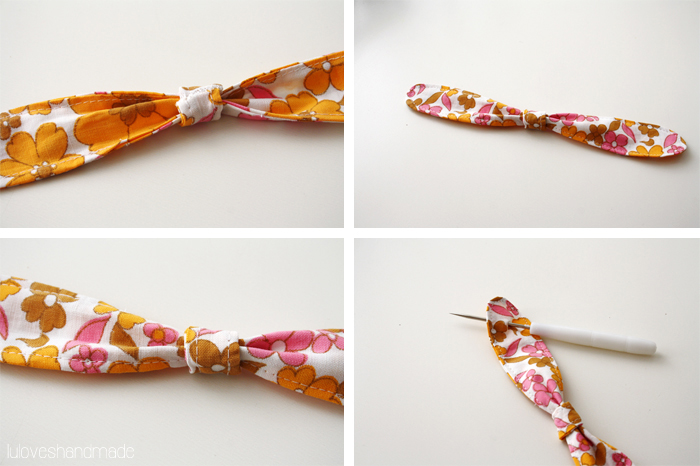
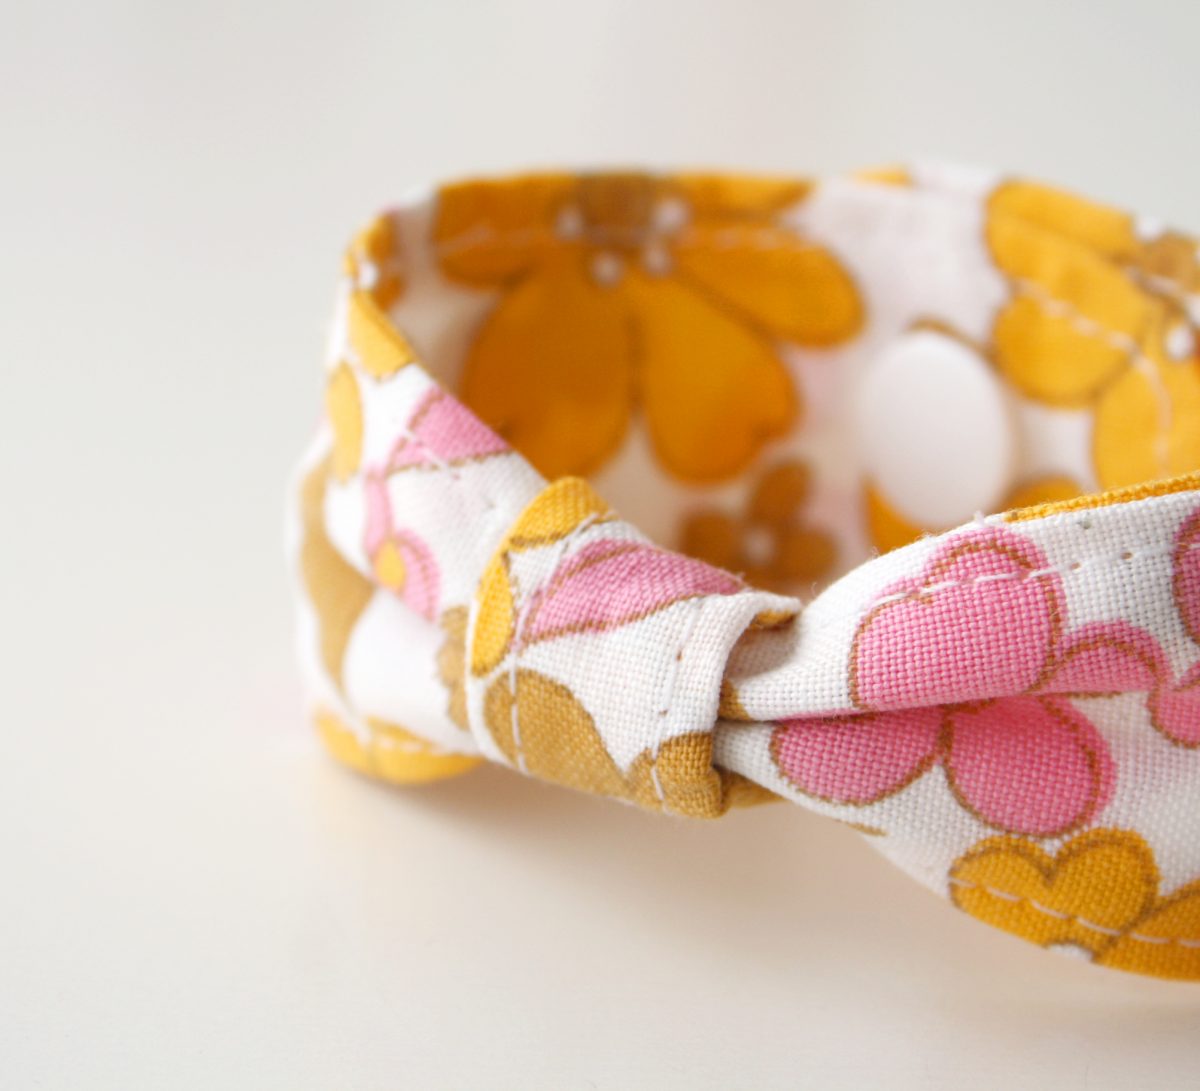
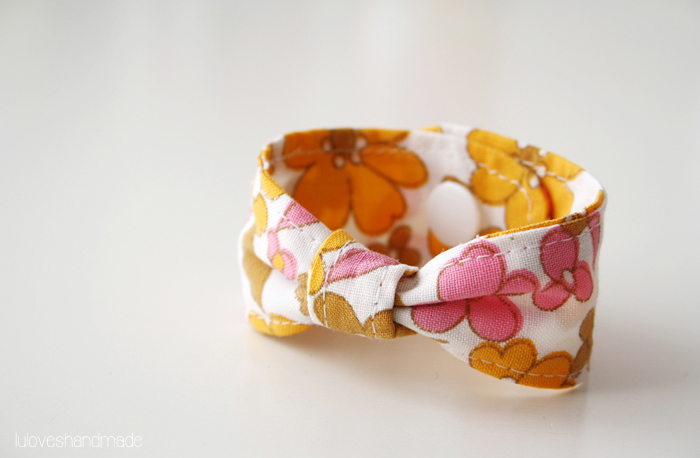
Fold the fabric strip inside out so that the endings with the zig-zag stitch are on the inside and aren’t visible anymore. That’s how it is supposed to look! :) Then figure out where you want the snaps to be at the endings of the bracelet (depending on how tight you want the bracelet to be) and use your bradawl to make two holes where you can put the snaps through.

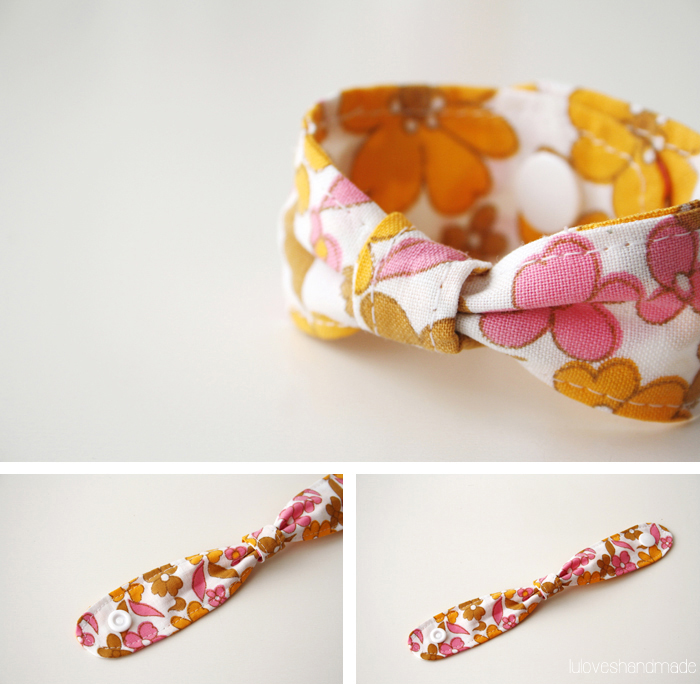
Push the snaps through the holes (according to the instructions on the package) and your’re done, yay! :))
That’s it!

Have fun with this DIY and in case you’re making such a breacelet yourself, feel free to post a link, I’d love to see your version! :)
Happy sewing, Lu :)


Das ist ja hübsch! Schöne Idee! :-)
Oh, das ist ja toll. So richtige Schleifen sind mir oft zu groß/auffällig, aber mit diesem Armband wird ja auch irgendwie eine Schleife angedeutet (oder bilde ich mir das nur ein?!) – gefällt mir sehr gut :-)
Bin gespannt auf deine weiteren Ideen!
Liebe Grüße, Goldengelchen
Woher ist den der schöne Blumenstoff?
Liebe Grüße
Sina
Finde ich auch ne super Idee. Hat man immer was passendes am Arm! :-))
Sehr hübsch und vielseitig gestaltbar! Perfekt für den Frühling! :)
Cool, wenn ich ein paar snaps auftreibe versuch ichs.
Lg Claudia
Ich raste aus – was für eine zuckersüße Idee! (: Ich habe diese Druckknöpfe schon oft gesehen, aber hatte nie Ideen für deren Verwendung… Aber so ein Armband brauche ich auch unbedingt!
Ich bin gespannt auf die weiteren Ideen & gratuliere zum neuen Sponsor (:
Alles Liebe,
Laura
http://www.tagtraeumerin.de
Das ist ne ganz süße Idee. Danke. :-)
Liebst
Das Fräulein Klee von Lusiluup
This is brilliant!
Looks really simple to make too :)
Lovely fabric as always <3
Wundervolle Idee!!! Genau das Accessoire, was man jetzt für den Sommer braucht. Danke für die tolle Idee!!!
Lg Jessi
Das ist ja eine schöne Idee, schnell gemacht und immer passend zum outfit. TOLL!
Viele liebe Grüße
Ute
Das sieht sehr hübsch aus! Und ist auch super zum Stoffreste verwerten. Wenn ich mich irgendwann durchringe, die Kam snaps zu bestellen, werde ich es sicher nachmachen.
Ich glaube so schnell habe ich selten ein gepinntes Projekt nachgemacht:
Mein Kam-Snap-Armband.
Es hätte zwar etwas erfolgreicher verlaufen können, aber ich werde das Armband definitiv nochmal nähen!
Danke für deine Anleitung und eine schöne Woche!
Liebe Grüße, Goldengelchen
Danke für Deine tolle Idee! Ich mache mich gleich ans Werk!
verena
Vielen Dank für das Tuto. Da weiss ich ja, für was ich meine Snaps gleich mal verwenden werde.
LG, Miriam
So schnell und einfach, tolle Idee! Danke für das Tutorial, das wir gerne bei uns im Blog empfohlen haben!
http://blog.swafing.de/2013/06/tag-der-handarbeit-2013/
Liebe Grüße und Danke für Deinen netten Kommentar!
Dein Swafing Blog Team
Tolle Idee…und tolles Tutorial
LG
Jutta